 |
| Before and after the clone stamp tool has been used |
The clone stamp tool is a very useful tool in Photoshop. It allows you to clone one area of an image and copy (stamp) it onto another area.
Step 1.
So first, in Photoshop, open any image from your computer by clicking File > Open.
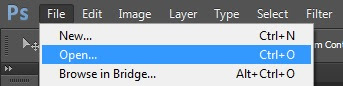 |
| Open file |
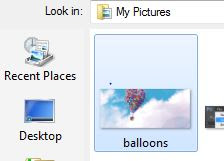 |
| Select file |
The clone stamp tool is located below the brush tool and above history brush tool. You can also use the keyboard short-cut "S" to use the clone stamp tool.
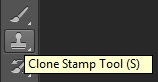 |
| Clone Stamp Tool |
Step 2.
Once we click the Clone Stamp Tool, the options bar at the top of the screen will populate with the associated clone stamp tool options. You can set your clone stamp options for the brush size, type, shape, opacity, flow and blending modes.
 |
| Option bar for Clone Stamp Tool |
If you only want to copy an exact area of an image you will leave the default settings here but you can also change the brush size and shape.
 |
| Image before the clone stamp tool is used |
Step 3.
So this is what our image looks like before, let's say that I want to remove the house that's hanging down from the balloons. I hold alt and left click on area I want to copy from, in this case that would be another area of the white cloud. And slowly brush over the house. (You will get a preview of the action by hovering the brush over the area before you click to paint/clone).
 |
| Image after some use of the clone stamp tool |
Step 4.
You can see that the copied cloud area is now covering the house. Keep repeating until the house is completely gone or you have achieved the desired cloning effect that you want.
 |
| The house now covered by 'cloned' clouds using the clone stamp tool |
Play around with different brush settings and options and try replacing different areas of your image to practice and get the hang of your Clone Stamp Tool.


 Reviewed by Unknown
on
March 15, 2016
Rating:
Reviewed by Unknown
on
March 15, 2016
Rating:


