 |
| The Final Result |
This is going to be a detailed tutorial on how to create shadows under text in Adobe Photoshop, this tutorial will guild you step by step in order to create shadows for your text for such work that might include doing some sort of title for a presentation to either do at home or for commercial use.
Step 1
Firstly begin by clicking on the text tool icon and to just simply type anything out and onto a layer in Adobe Photoshop to have something to work for the tutorial. Make sure to have a background layer already in place in order to even the text tool and you can change the font and the size of the text in the top tool bar in Adobe Photoshop. Also if you cannot see the text when you type then try changing your background color because if your background is white and your text is also white then you will not see the text without changing the text or the background to a darker color.
 |
| Creating a text layer |
Step 2
The next thing to do would be to duplicate the same layer by right clicking on the original text and clicking on duplicate layer. The duplicate text will be behind the original text, so make sure to use the move tool in order to drag the text out. Nothing else should be selected but the text copy at this step.
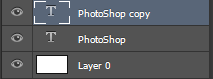 |
| Creating a text layer copy |
Step 3
Then go to Edit/Transform/Flip Vertically in Adobe Photoshop to flip the text upside down. This would help create the mirror effect for the text. The move tool will help you to move the text into position under the original text.
 |
| Flipping the copy text vertical |
Step 4
When the text copy layer is selected then right click, then go down to warp text and click on it for a window to appear, you will then want to click the drop down menu and what I personally selected would have been the Arc Upper, make sure that the "horizontal" is selected, Bend: +14, Horizontal Distortion: +4 and vertical distortion set to -19 then you can change the text to how you may want to have the text.
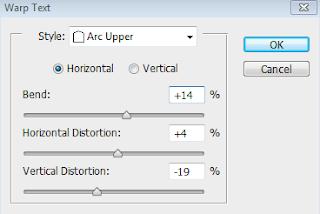 |
| Warping the text copy in Adobe Photoshop |
Step 5
After that to adjust the size of the text, then you will need to click on the text layer and then hold Ctrl+T this will activate the free transform tool to adjust the text to how you may like it. The free transform tool can only adjust the size and shape of the text that is selected.
 |
Using the free transform tool to edit the original text
|
Step 6
Then the next thing would be to use the free transform tool to adjust the text copy layer in order to get it set up in the right position, which would involve making the image larger so that the text lines up directly under the original text. The text copy image has now begun to look more like the shadow of the original image.
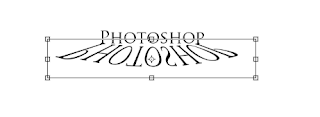 |
| Adjusting the text copy using the free transform tool |
Step 7
To apply a gradient overlay by clicking the add layer style button to the text copy to give it a fading out effect to the copy text or have a blend of two different colors. Then set the blend mode to normal, opacity 100%, the style linear and the gradient a shared proportion of both black and white on the text. After that you will need to use the gradient tool to drag the mouse cursor across the screen in order to create the blend of the two colors on the text.
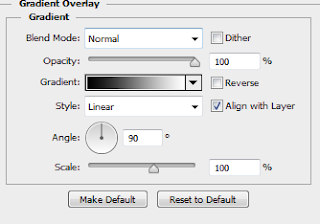 |
| Adding a gradient overlay for the text |
Step 8
The next would be to adjust the text copy layer opacity to somewhere around 40% and it should be complete. Feel free to go ahead and try this method for yourself. The opacity is located to the right of the window in Adobe Photoshop and the text will begin to fade the lower the opacity, 100% opacity being solid and 0% then the text will simply disappear, 40% opacity will be the lowest I will go for the shadow of the text, but feel free to experiment with the different opacity settings to get some unique shadows for the text.
 |
| Changing the opacity of the text copy to 40% |
 |
| The Result: The text now has the effect of casting a shadow |


 Reviewed by Opus Web Design
on
January 29, 2016
Rating:
Reviewed by Opus Web Design
on
January 29, 2016
Rating:


