This tutorial is the fourth in the 10 part series on
how to create a first person shooter game using Unreal Engine 4. We recommend you read the previous articles first to get the maximum benefit from this tutorial.
Game BSP and Geometry
In our game we will be creating just one main building, however you can use the same steps covered below to create multiple buildings if you wish.
 |
| Basic Building Structure |
Step One
To begin, in the place tab go to the BSP section and select a cube. Drag and drop it into your game.
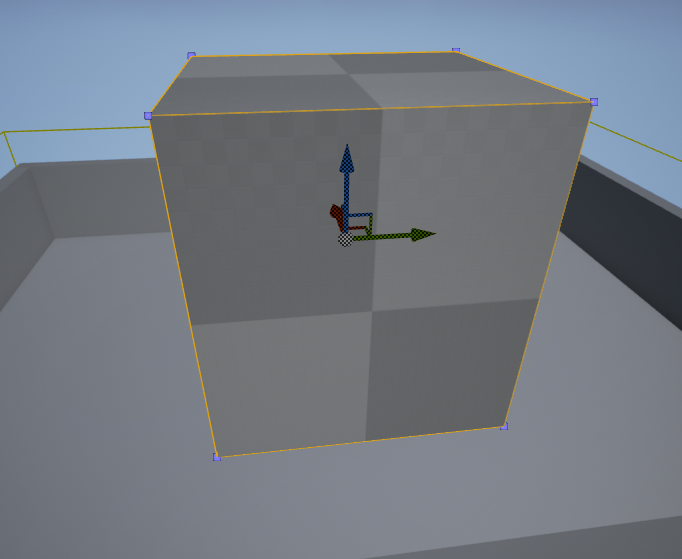 |
| image above shows a cube you can get in your BSP folder |
With the cube still selected, in the details panel, select the hollow option as shown below. A wall thickness of 16 is also recommended.
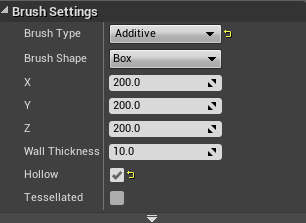 |
| Make sure you select hollow its on the right side |
You will also want to change the width and height of the cube. We have used values of 1024 on the X, 2048 on the Y and 1024 on the Z. Alternatively you can select the cube and press the space bar to toggle the widget to get to scale mode and manually scale the cube to whatever size you want.
Step Two
We will now create windows and a door. In order to do this you need to go back to the BSP section and select and drag out a cube again. After bringing your cube into your game you will then want to place it at the part of the building that you want your window to be and scale it using the values in the details panel or manually using the scale widget as we did earlier. When you have it lined up, in the details panel you will change the cubes brush type to subtractive.
|
|
Set the brush type to subtractive in the details panel of the cube
|
This will subtract a part of the wall out where the brush is positioned, as shown below.
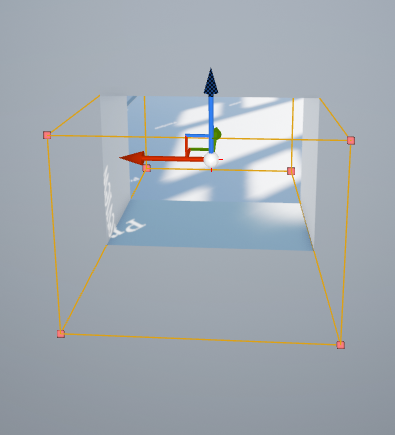 |
| when you select subtractive it will come up like this |
Simply repeat this process for the other windows and the door.
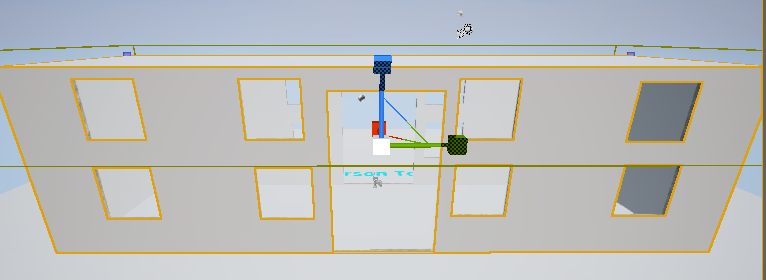 |
| The main building structure with the windows and door cut out. |
Step Three
In this step you will be adding a material to cover your building in. In order to get a texture you will first have to go into your materials folder and search for a material that suits. You may choose to use the material that was created in the
previous tutorial. Once you have selected the material you want, simply drag and drop it on the surface of the building.
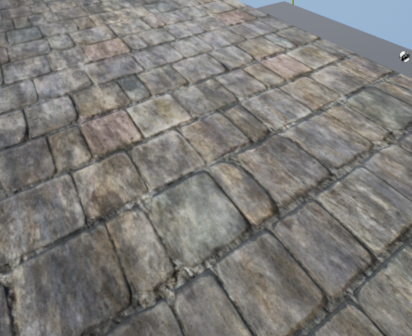 |
| when the materialis placed down on the object it will look like this |
In the details panel of the building (BSP cube) you can select multiple surfaces at apply the material to them all at once. The material can also be scaled, nudged, rotated and positioned using the options in this panel.
Step Four
In this step we will be creating the pitched roof of the building. First select the building and then change from place mode to geometry mode in the modes section as shown below.
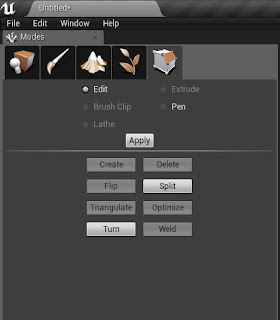 |
| Geometry Mode |
You will then need to select an edge (this can be difficult so be patient) on the side of the building. If you find this very difficult in perspective view you could switch to a top down view as shown below.
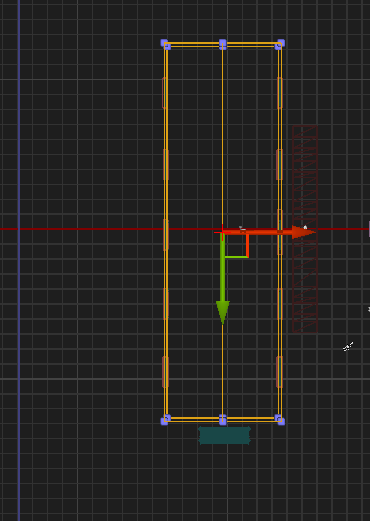 |
| A top down wire-frame view |
Once you have an edge selected the split option will become active in the geometry panel. After selecting split you will then see a line going down the centre of your building. Now simply select this line and bring it up on the Z axis (blue) to create the pitch for the building's roof as shown below.
 |
| it is important top note that when you pull the top part of the roof the inside is still flat |
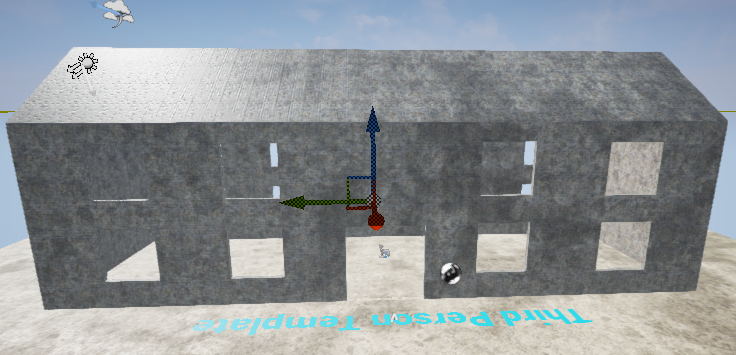
Step Five
Now that the basic structure of the building is complete you can begin editing it or adding details such as a porch area, columns, steps and more all using the shapes from the BSP section. The image below shows the main building used in our First Person Shooter Game.
Next Up
In the
next tutorial we will show you how to create a pick-up/collectable for the FPS game.


 Reviewed by Opus Web Design
on
February 13, 2016
Rating:
Reviewed by Opus Web Design
on
February 13, 2016
Rating:


