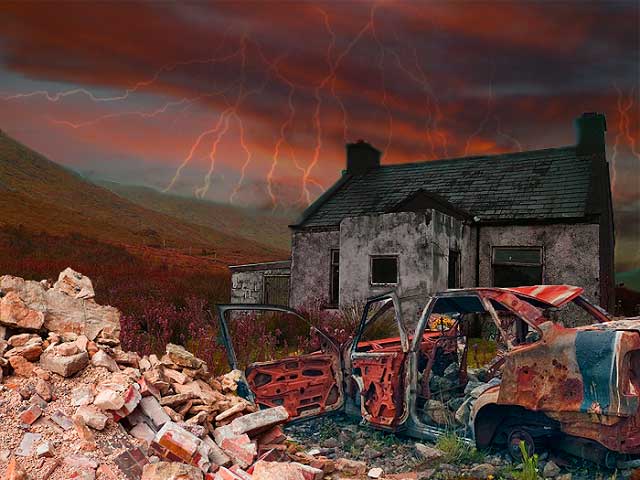
Post Apocalyptic Scene Using Photoshop
 |
| The completed post apocalyptic scene made using Photoshop |
1. Choose a selection of images that you would like to work with. The images should ideally be old, worn or aged or derelict in appearance or of broken or old objects. I have chosen the pictures below.
2. Open all the images in Photoshop by going to file-> open and navigating to where the images are saved.
3. We will be using the image of the derelict house as our base image. Firstly we are going to remove the existing sky from the image. To do this first unlock the image layer by double clicking on the lock icon beside it in the layers window and choose ok in the subsequent pop up window. Next use the quick selection tool from the toolbar (may be under the magic wand) to select the sky, once selected press backspace.
4. Now use the move tool to drag and drop the sky image from its layer window into the derelict house image (you can also import it directly if it is not already open using file-> import). Use Edit-> Transform-> Scale to resize the image to a size that looks realistic within the scene. Place the sky image on a layer beneath the derelict house, this can be done by dragging and dropping it up or down in the layers window.
5. The next stage is to start adding the post-apocalyptic atmosphere using Hue and Saturation. Go to Image-> Adjustments-> Hue and Saturation. Try out different values to achieve different colours; I used Hue -30 and Saturation +30.
6. We now start to cut out the car from its background, similar to cutting the sky from the house image. Check that the layer is unlocked and then use the quick selection tool to select the area you want to remove the press backspace or delete. Once the background is removed use the move tool to drag and drop the car image into the scene. Use Edit-> Transform-> Scale to resize the image to a size that looks realistic within the scene. Use the move tool to position it where you want it and edit the Hue and Saturation values to get the car to blend better with the overall image.
7. The next step is basically a repeat of the previous step only using the rubble image this time. The one main difference is that I mirrored the rubble image so I could position it on the left side of the image. To mirror the image, go to Edit-> Transform-> Flip Horizontal. Now edit the Hue and Saturation values to get the rubble to blend better.
8. The final part of the image is the lightning, once again use the move tool to drag and drop the lightning into the scene and position the lightning layer above the sky layer but below the other layers. In order to blend the lightning into the sky we must select the lightning layer and go to Layer-> Layer Styles-> Blending Options. With the blending window open choose the multiply option and reduce the opacity to a value that looks good, I used 40%. If you want you can also edit the Hue and Saturation values of the lightning and sky layers to get them to blend better.
And that's it. Here's the completed apocalyptic scene.
Post Apocalyptic Scene Using Photoshop
 Reviewed by Opus Web Design
on
November 26, 2013
Rating:
 Reviewed by Opus Web Design
on
November 26, 2013
Rating:


