 |
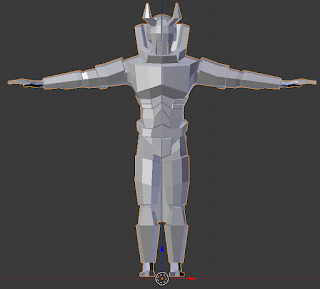
| Extruding out from legs. |
We're going to start with the feet, as they're simpler than the hands. Start by extruding out slightly from the bottom of the legs, and then extruding again about the same length.
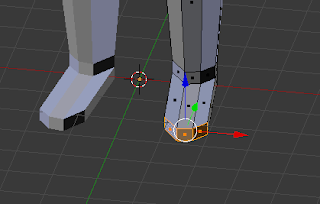 |
| Extruding feet outwards. |
Using Face Select, select the faces on the front of the bottom extrusion and extrude them outwards as far as you want. Different people have different sized feet, so proportions here are up to you.
 |
| Adjusting big toe shape. |
Next, select the edge of the inside 'toe' area and drag it inwards to form the big toe area.
 |
| Adding loop cut. |
 |
| Bring edge in. |
Add a Loop Cut slight back from the end of the foot, and then move the edge of the big toe slightly towards it's original location, creating the curve where the foot transitions into the toes.
 |
| Bringing edge inwards. |
Select the edge on the inner side of the foot in the middle and drag it inwards to create the curve of the foot.
 |
| Selecting edge between foot and shin. |
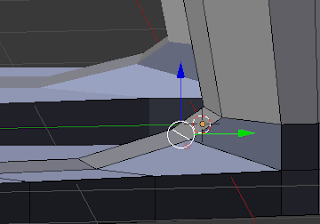 |
| Dragging it upwards and outwards. |
Select the edge on the very front , right before the foot extends outwards. Move the edge upwards and outwards.
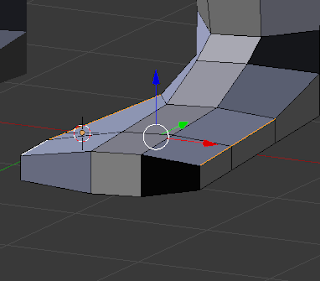 |
| Dragging side edges downwards. |
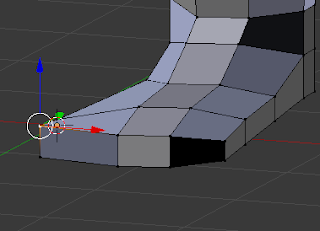
Drag the edges on the side of the foot down to create a curve on top.
 |
| Bringing big toe up. |
 |
| Dragging toes upwards. |
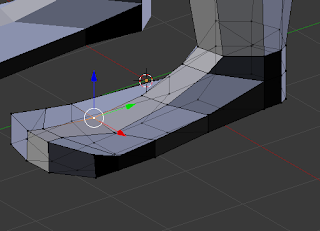
Drag the vertices for the toes upwards slightly.
 |
| Adjusting the feet. |
At this point you should adjust the foot to your own liking if this doesn't suit you. Maybe make it look more like a boot than a bare foot if that's what you need.
 |
| Bringing loop upwards. |
 |
| Bringing loop upwards. |
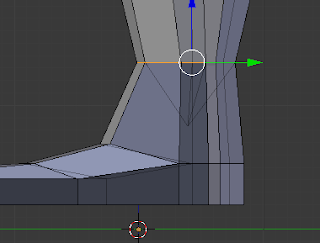
At this point you should drag both of the original Loop Cuts upwards for a more realistic transition from shin/calf to foot, and also to form ankle of the foot.
 |
| Scaling edges inwards. |
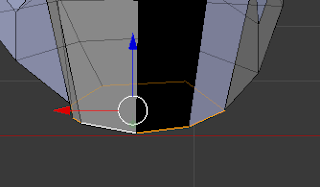
Finally, select the ring of edges that make up the heel and scale inwards.
 |
| Assessing the foot. |
The foot is finished, and it's time to move on. First though, take one last look to make sure they are what you want, but don't worry too much as they can always be edited later.
 |
| The full model so far. |
The Hands
At this point the model is coming along nicely, and all that's left to do are the hands.
 |
| Adding a cube. |
To start with, add a cube. This is the first new mesh we've added since the original cube.
 |
| Reshaping the cube. |
Scale the cube so that it is much flatter, shorter and thinner, closer to the size of hand you want for your character.
 |
| Adding loop cuts. |
Add a Loop Cut down the length of the shape. Before adding it, use your mouse wheel to add three loops, as shown above.
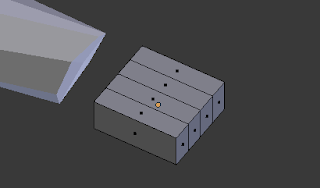 |
| Shortening the shape. |
Adjust the size of your shape so that it is roughly the size you want for the palm of your hand.
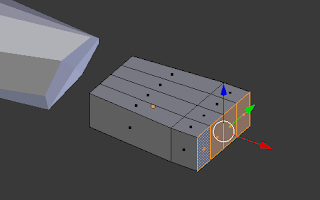 |
| Extruding out to create the knuckles. |
Select the four face on the outer surface of the shape and extrude them all out slightly to create the knuckles for your hand.
 |
| Moving edges down. |
Select all of the edges or face on the opposite side, close to the body, and just move them down slightly to create a curve between your knuckles and your palm.
 |
| Extruding one by one. |
Select the faces of your knuckles and extrude them one by one to create your fingers. Look at your own hand or the hand of a friend if you don't have one and adjust the finger lengths accordingly. The middle finger should be the longest, while the index and ring fingers are roughly the same size. The pinky finger is shorter than all of them.
 |
| Make sure they're all the right length. |
 |
| Scale the tips inwards. |
Select the faces at the tips of your fingers and scale them inwards one by one. Again, the middle finger would have the widest tip, the index and ring would be about the same and the pinky is much smaller.
 |
| Scale the joints inwards. |
Select the loops around each finger and scale them in accordingly to the size of each finger.
 |
| Re-positioning the pinky finger. |
Select all the faces on the pinky finger and move it away from the rest of the fingers slightly, creating a small gap.
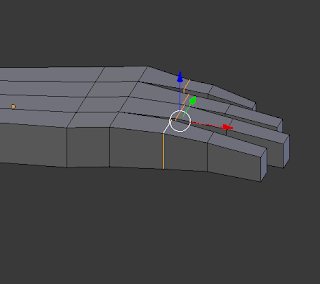 |
| Selecting edge loops. |
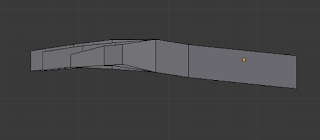 |
| Moving them up. |
Select the first edge loop after the knuckle for each finger and raise them all slightly, so there is a slight curve between the knuckles and the tips of the fingers.
 |
| Adding a cube. |
 |
| Completed thumb. |
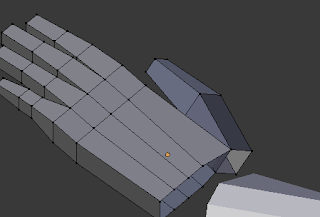
Add another cube and scale it down to fit the size of the hand. It needs to be located at the beginning of the hand, where the wrist would be. This will be our thumb. Repeat the exact same process for the thumb as the rest of the fingers, but remember there is only one joint in the middle of the thumb. Also keep in mind that the thumb is shorter and fatter than the rest of the fingers. Once the thumb is created, rotate it slightly so that it is tilted diagonally to the rest of the fingers.
It is important at this point to switch back to Object mode for a moment, select the thumb, and shift-click the hand so that they are both highlighted. Pressing Ctrl-J when multiple objects are selected like this merges these objects together, so that when you select one you select both even if they are not physically connected. You want to do this, because otherwise you won't be able to perform this next step.
 |
| Connecting the vertices. |
 |
| Vertex snapping. |
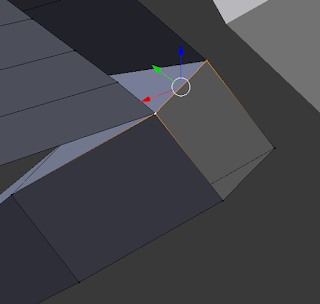
Once the thumb is in place, and you've joined it to the hand using Ctrl-J, activate vertex snapping mode. As shown in the image above, activate the little magnet icon and then in the menu beside it select vertex. Now you need to select the two vertices close to that hand on the thumb and connect them to the hand as shown above. Make sure to turn snapping off afterwards.
 |
| Raising the edges. |
To further shape the hand, select the three edge loops going down the length of the hand and raise them upwards very slightly.
 |
| Selecting the edges. |
 |
| Extruding towards the arm. |
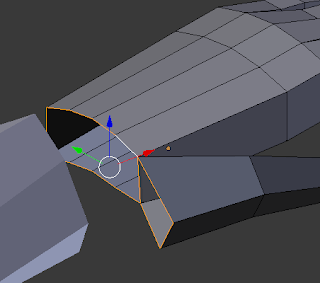
Select the edges around the beginning of the hand and extrude them outwards towards the arm. Before continuing just make sure your hand is in the right position. Move it up, down, sideways, whatever you need until it looks right.
 |
| Selecting the three vertices. |
 |
| Merging at center. |
Now you'll want to select the vertices connected to the three edge loops running down the length of the hand, the ones closest to the body on the top of the hand. Select the three of them and them press Alt-M and choose the option to merge them at the center. This will bring the two on the outside inwards and snap them to the middle vertex. Do this for the same vertices on the bottom of the hand. The purpose of this is to lessen the amount of vertices for when we connect the hand to the arm.
 |
| Joining the hand to the arm. |
Next we need to join the hand and arm meshes. Select the hand FIRST and then shift click the arm, and press Ctrl-J to merge them. The reason for clicking the hand first is that when merging meshes this way, the last mesh selected is the parent, and the child meshes take on the parent's modifiers. If the arm was selected first and then the hand, merging them would remove the mirror modifier from the resulting joined object, meaning half of your character's body will be gone. Nothing too major as you could simply reapply the mirror modifier afterwards, but doing it in the right order is quicker. If for whatever reason you did it in this order and it still removed half the body, then either undo using Ctrl-Z and simply swap the order around, or proceed to simply reapply the mirror modifier.
 |
| Connecting vertices on bottom. |
 |
| Connecting vertices on top. |
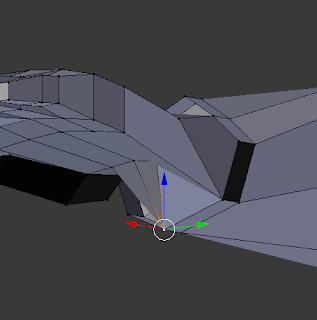
Now that the hand and arm are part of the same object, we need to merge each individual vertex on the hand with it's corresponding vertex on the arm. Simply select a vertex on the hand or arm, the order doesn't matter, then shift-click it's matching vertex on the other shape and press Alt-M and merge at center again. Do this for each vertex until the hand and arm are full connected.
 |
| Adjusting the wrist. |
Now that they're connected, do what you need to make it more natural. Select the wrist and scale it inwards, re position the hand, etc.
 |
| Finished model from the front. |
 |
| Finished model from the side. |
Congratulations! You've finished creating the shape for your character. Make sure to save him and keep this original file to use as a template for multiple future characters. Using all the tools you've learned, and experience you've gained, you can do so much with this character. For instance, below are some characters I have created using these methods.
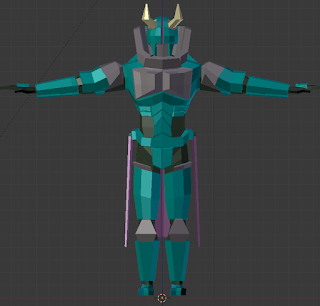 |
| Sci-Fi/Fantasy Armoured Dude. |
Instead of complicated textures, simple materials can be added to colour your character.
 |
| Heavily Armoured Dude |
 |
| Heavily Armoured Dude Female Edit. |


 Reviewed by Tyrone Ward
on
March 11, 2019
Rating:
 Reviewed by Tyrone Ward
on
March 11, 2019
Rating:


