 |
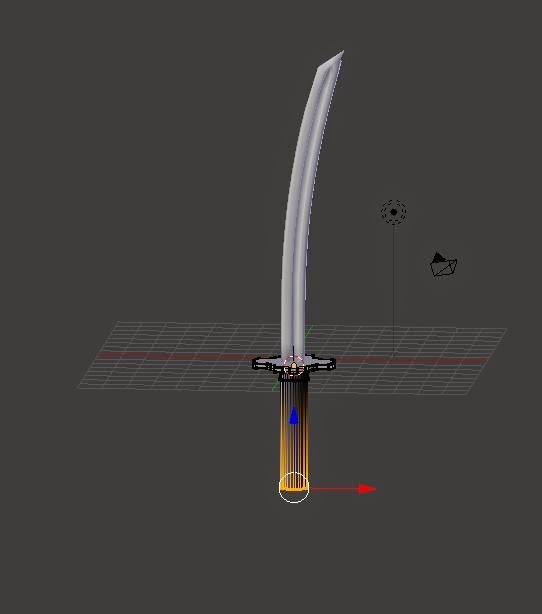
| finished result |
In this tutorial you will learn the necessary skills on how to make a sword, specifically, the sword we will be making a Japanese Katana.
Part 1 The Blade
Change to cycles render
 |
| Cycles Render |
Delete cube, press
1 and then
5 for orthographic view,
shift A to add plane,
R to rotate on the
X axis by pressing
X then
90.
 |
| plane |
Tab for edit mode
S scale on the
X axis
 |
| plane scaled |
Press
shift and
tab for the
snap during transform button or hit the magnet button, select the top vertex
 |
| Snap during transform |
 |
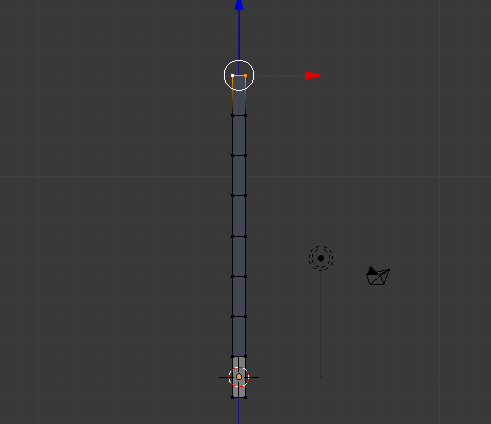
| vertex selected |
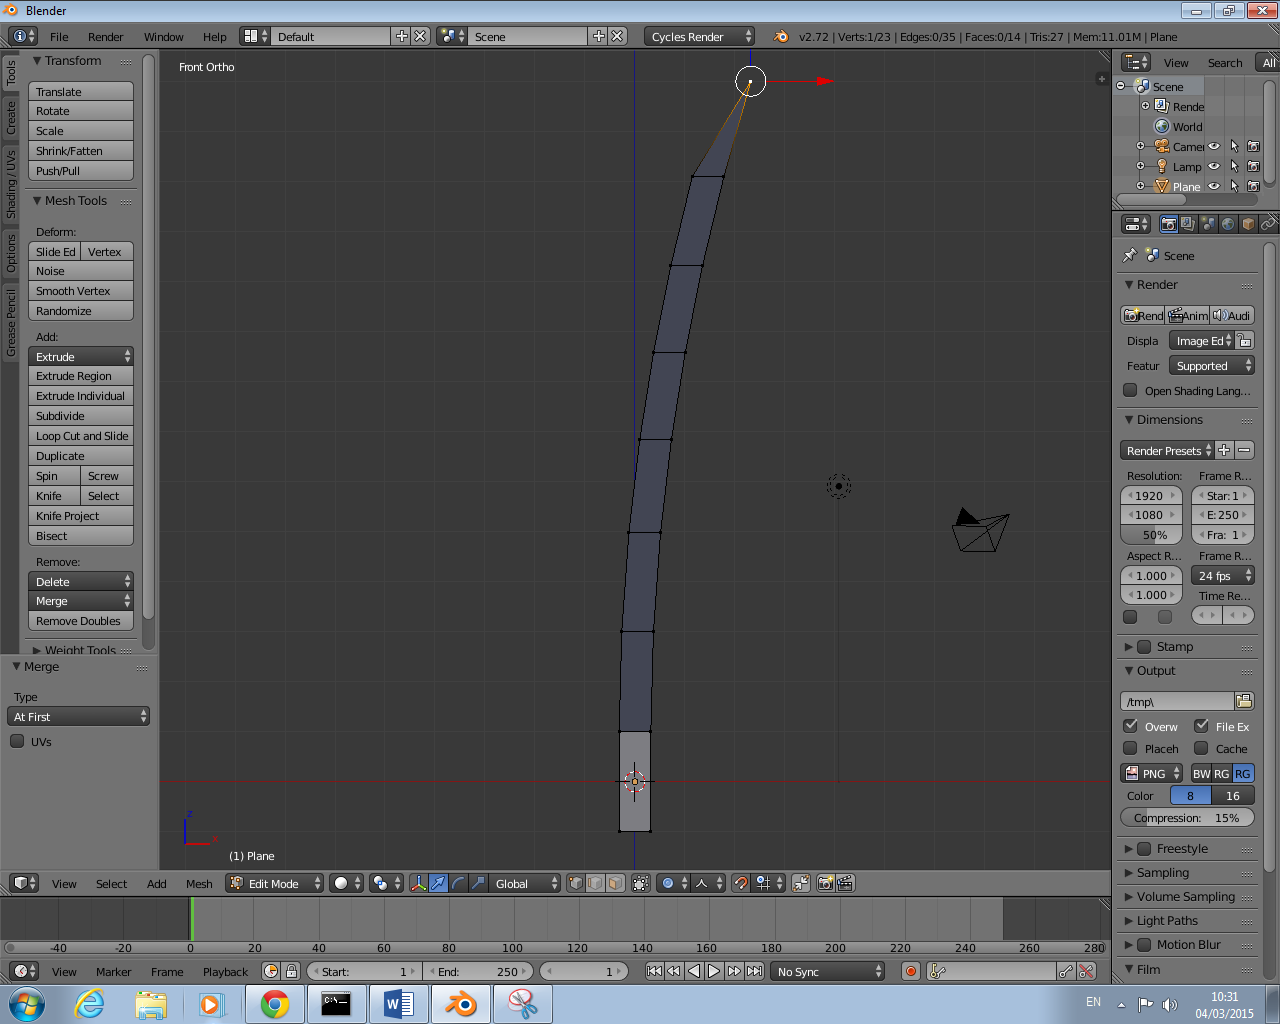
E to extrude up to 16 boxes,
turn on proportional editing,
 |
| extruded plane |
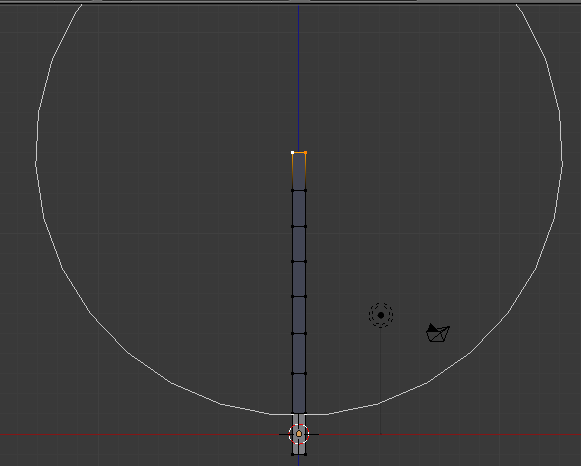
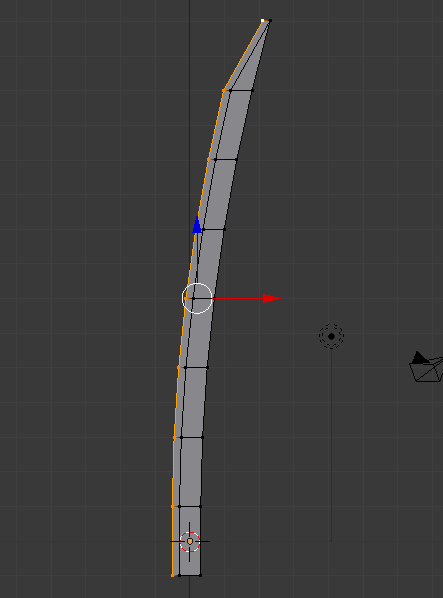
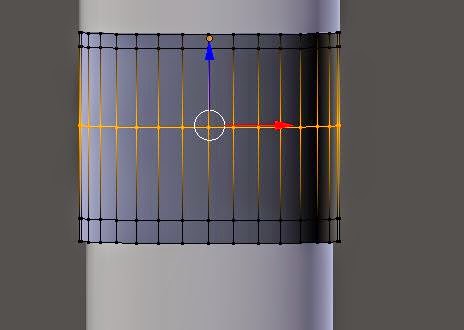
Once proportional editing is on
G to grab on the
X axis, scroll mouse button
 |
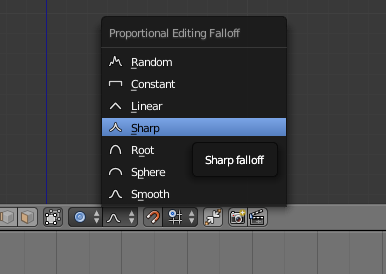
| Proportional editing |
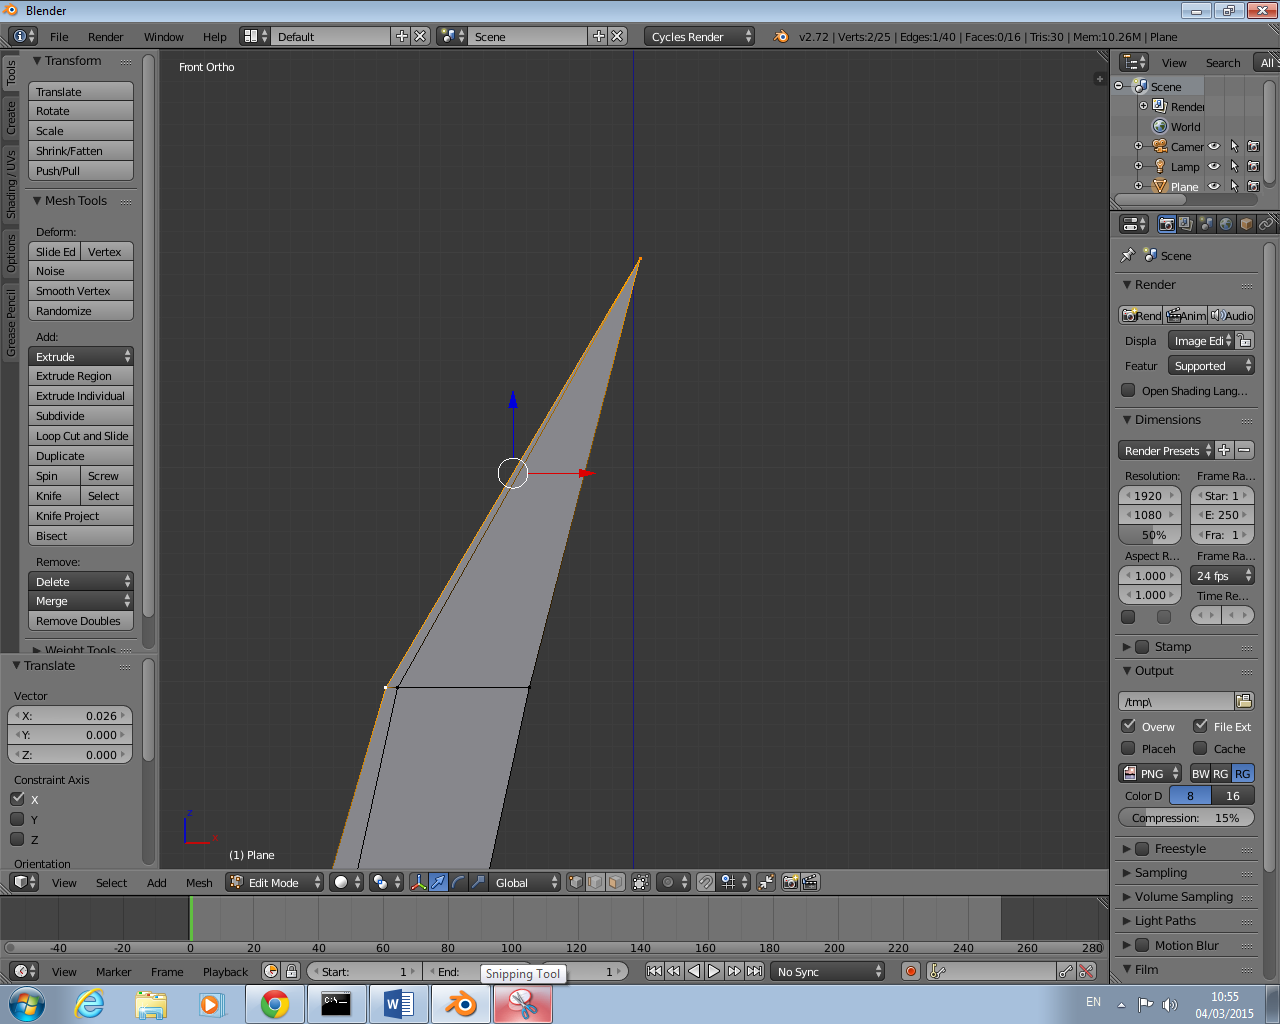
Change to sharp
 |
| sharp |
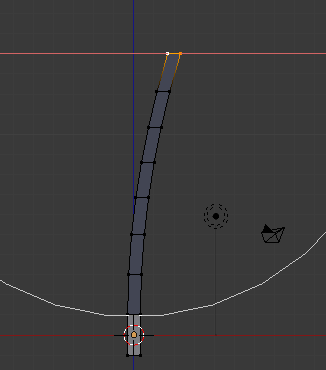
Move too two boxes to the right
 |
| sharp tool in use |
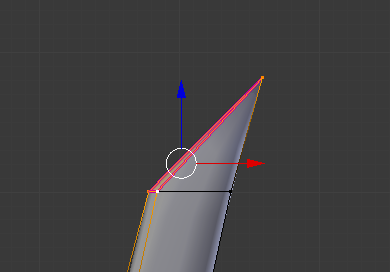
Click the right vertex then the second, press
W to merge, at first,
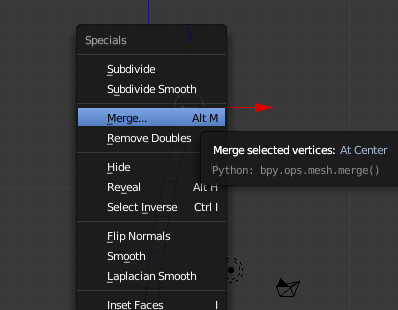 |
| merge |
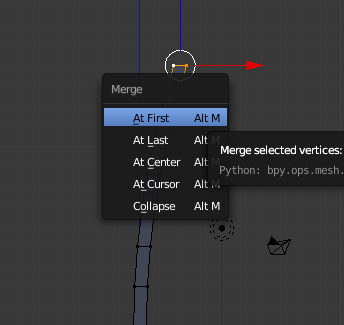 |
| at first |
 |
| merged point |
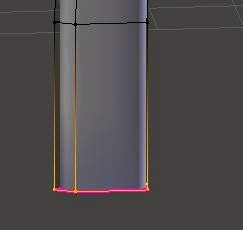
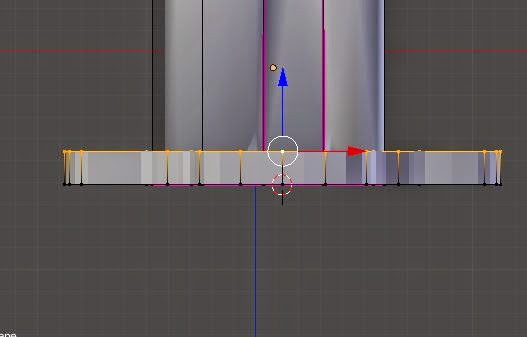
Turn proportional editing and
snap during transform off, select the outside of the blade by pressing
B and dragging it along the left side or by selecting each vertex individual by hitting
shift and
right click,
E to extrude on the
X axis a small bit.
 |
| extruded |
Merge the top vertex, move the bottom one slightly to the right
 |
| merged |
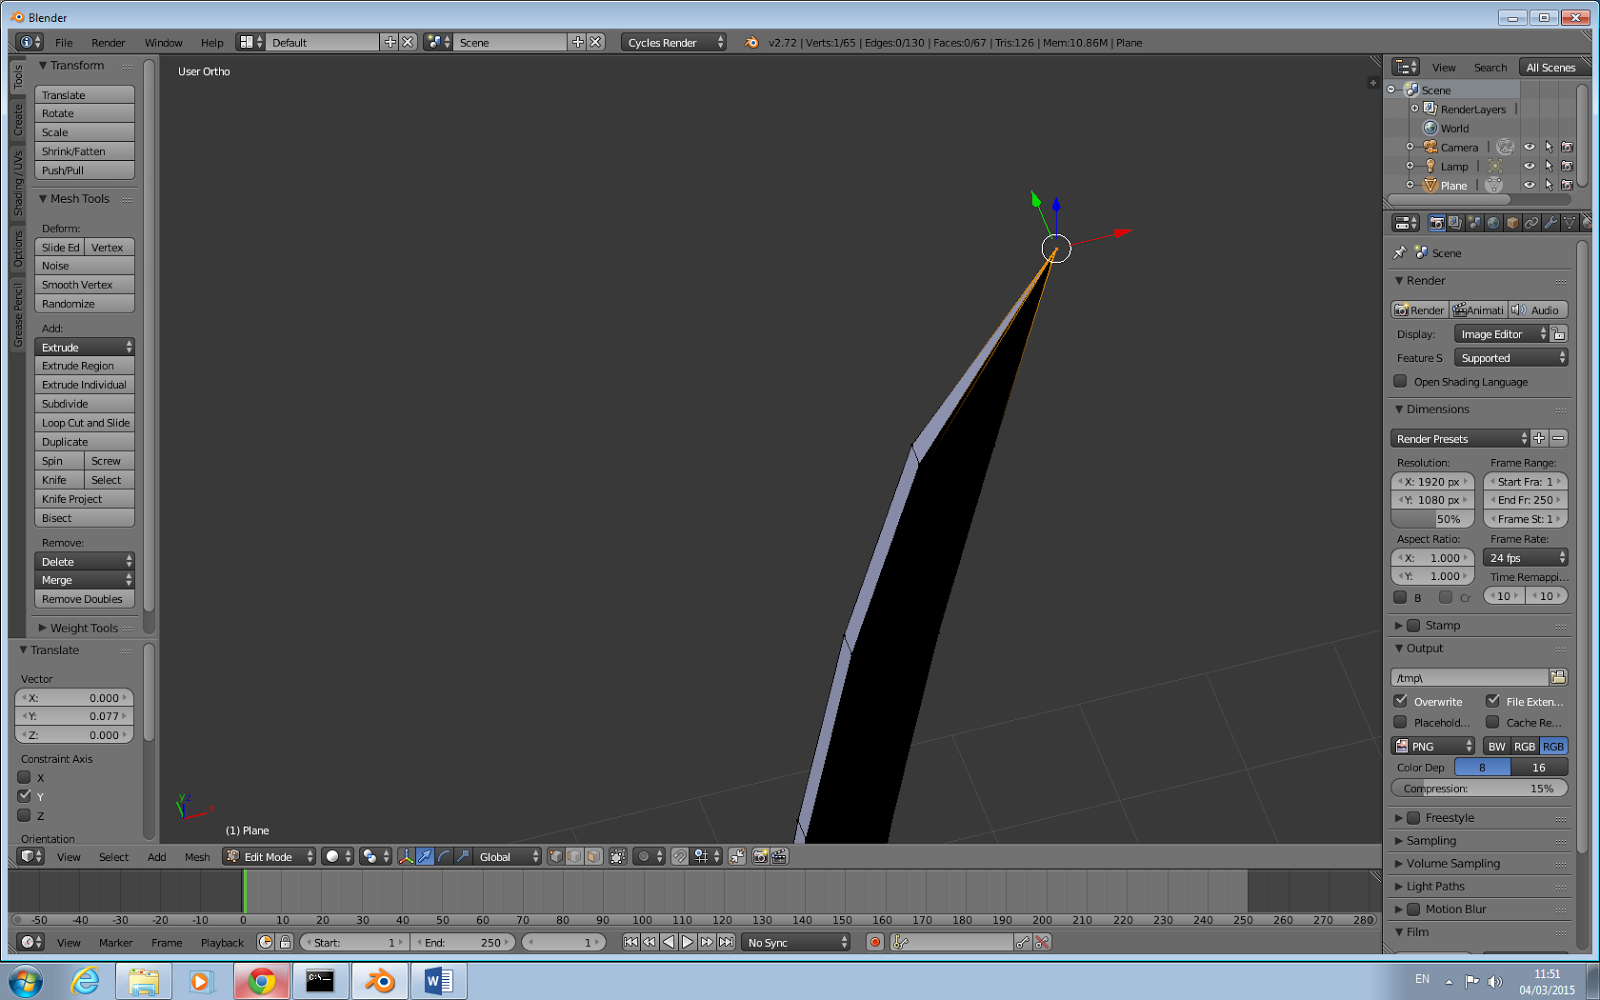
Press
A to select everything, change view by
3 on the keypad,
E to extrude.
 |
| extruded |
Merge the two points together
 |
| merged points |
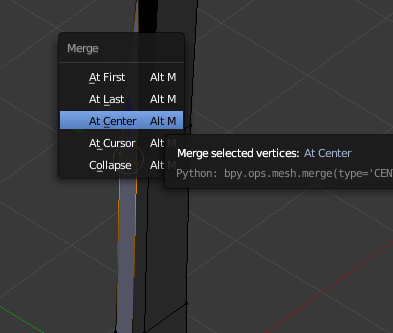
Select the next vertex underneath the top point and its opposite one press
W , merge, at centre do this to the rest.
 |
| at center |
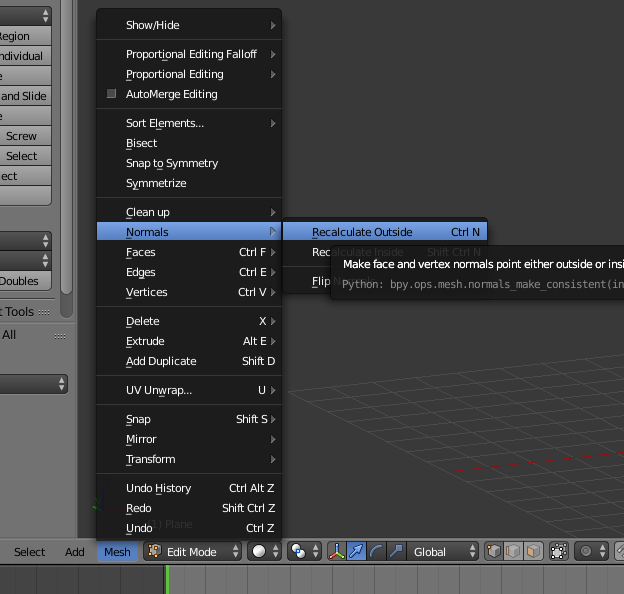
To fix the lighting and shade go to mesh, normals, recalculate outside or inside this will prevent the blade from being dark at certain angles.
 |
| Normals |
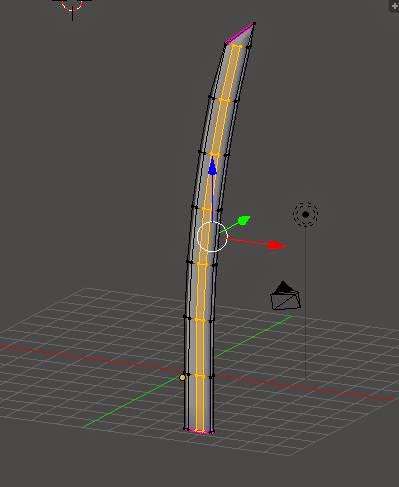
Tab and
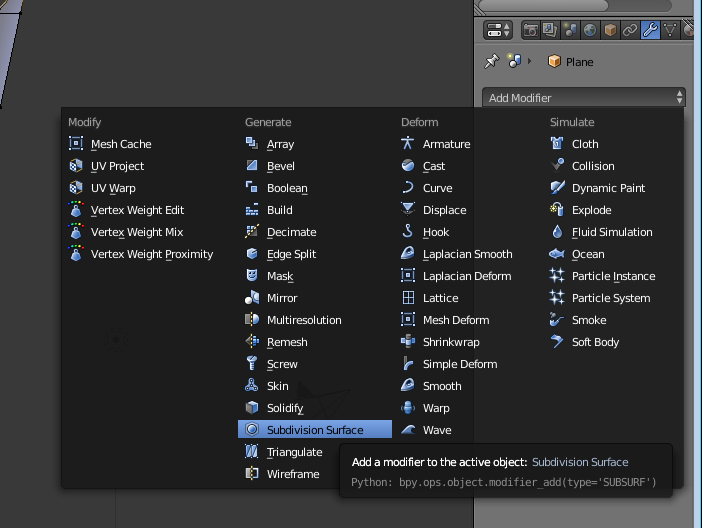
smooth. the smooth button is to the left it will show if your out of edit mode. add a modifier, subdivision surface, change render to 1.The blade will look off, go into edit mode by pressing
Tab, select the these 4 vertex
 |
| subdivision |
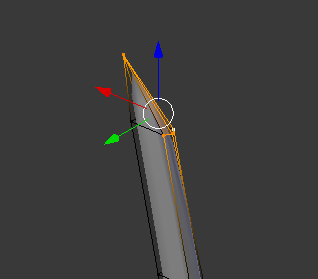 |
| 4 points selected |
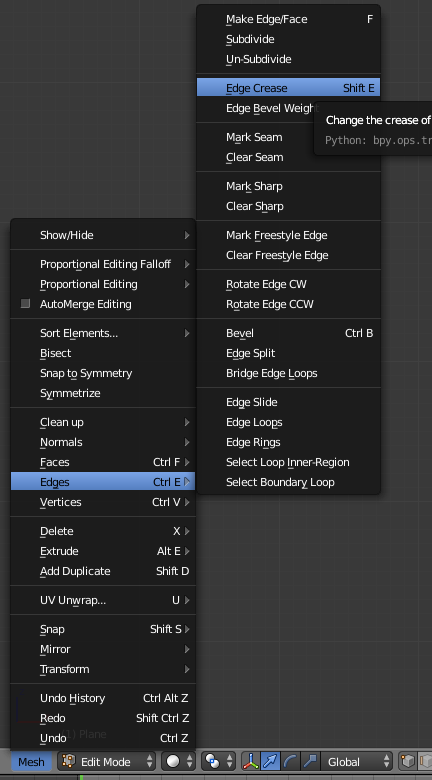
To fix the problem that will happen go to mesh, edges, edge crease. once clicked drag your mouse across the screen to the right side. this fill the empty space, repeat this for the bottom of the blade.
 |
| edge crease |
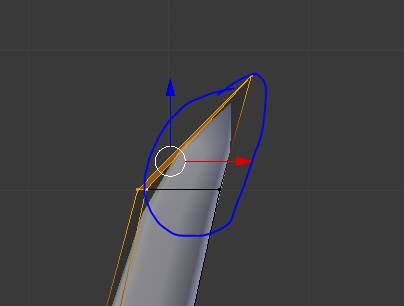 |
| using edge crease |
 |
| edge crease used at the top of the sword |
 |
| edge crease used at the bottom of the sword |
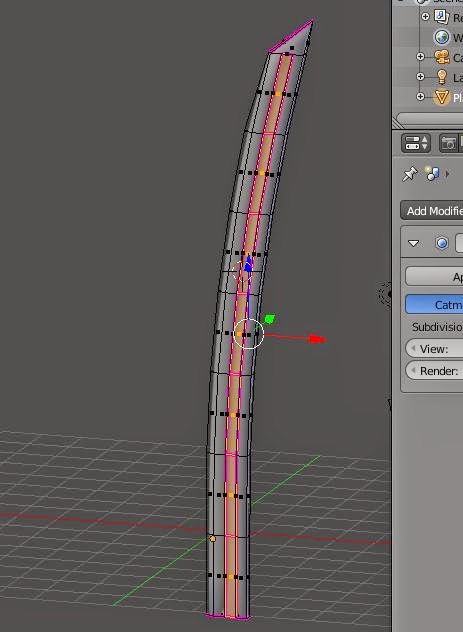
To add a flare onto it create a loop cut ctrl R lenght wise twice
 |
| creating a flare in the sword |
Press E to extrude and right click straight away so it sits on top, S scale on the Y axis pull it in to your desired depth. Then add edge crease to make the depth stand out.
 |
| adding depth |
Part 2 The Hilt
Select all of the vertexes by pressing Band dragging it across or by selecting each one individual by shift and right click.
 |
| bottom all selected |
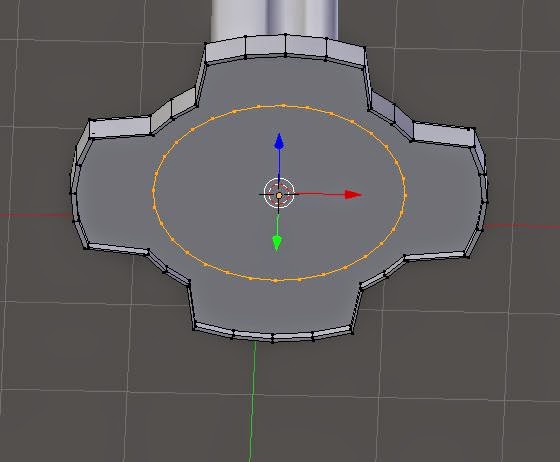
Mesh, snap cursor to selected that will center the 3d cursor at the bottom of the blade,
shift A add a circle,
tab into edit mode, select these vertices
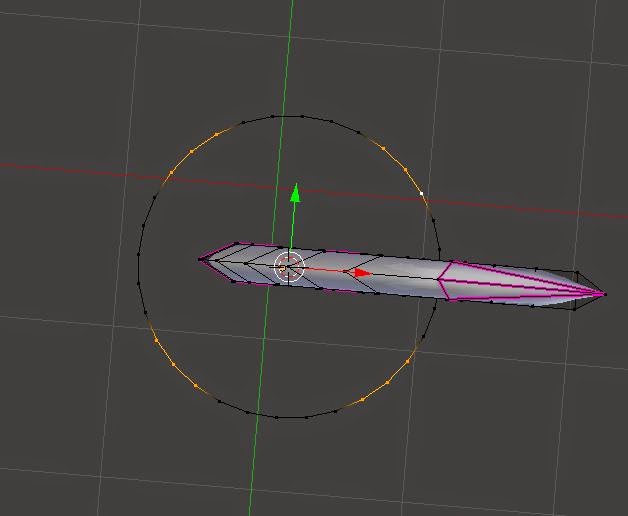 |
| six vertices selected |
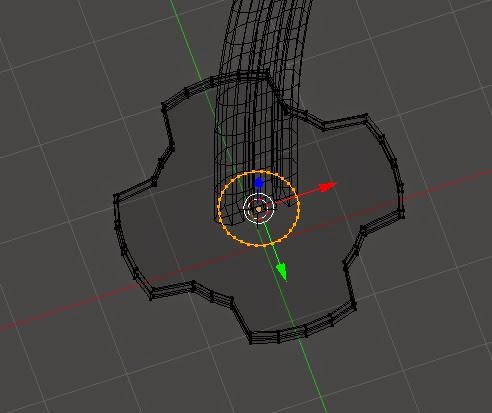
S scale them inwards like so
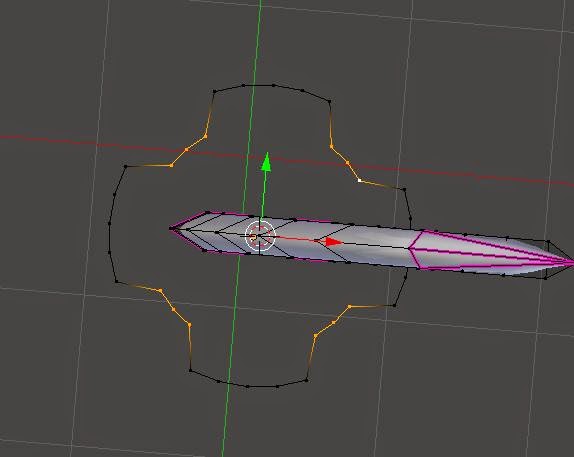 |
| scale inwards |
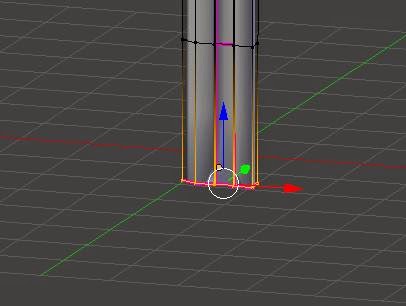
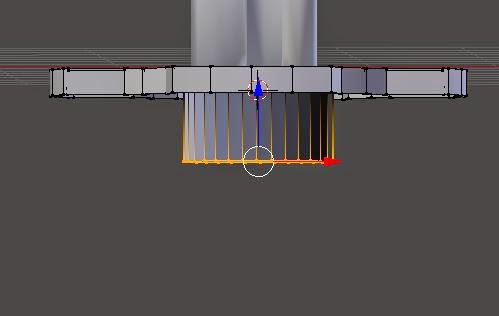
go into front view
1 select the circle
E extrude on the
Z axis
 |
| extrude |
Create a face by hitting
F
 |
| add face |
E to extrude
right click straight away
scale a small bit
extrude on the
Z axis downward to create a small lip. Repeat this step for the bottom
 |
| creating small lip |
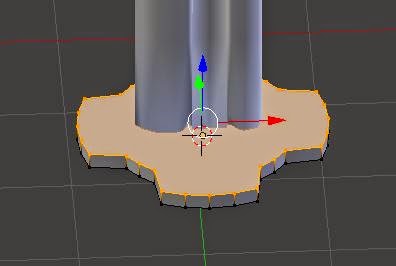
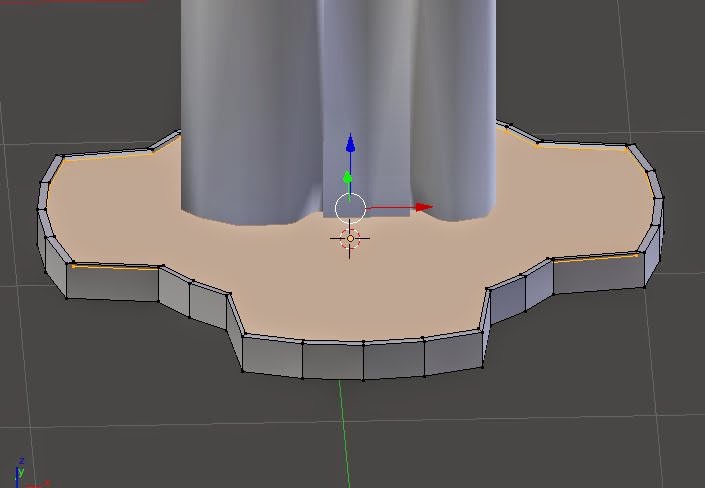
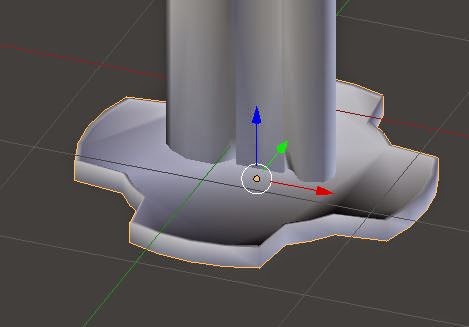
Click on the hilt, click on smooth this will create an issue to fix this, add a modifier, edge split this will fix it.
 |
| smooth |
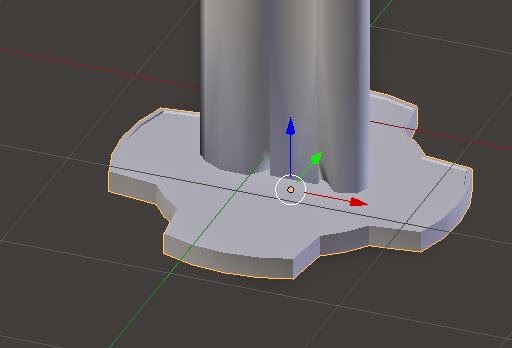 |
| edge split |
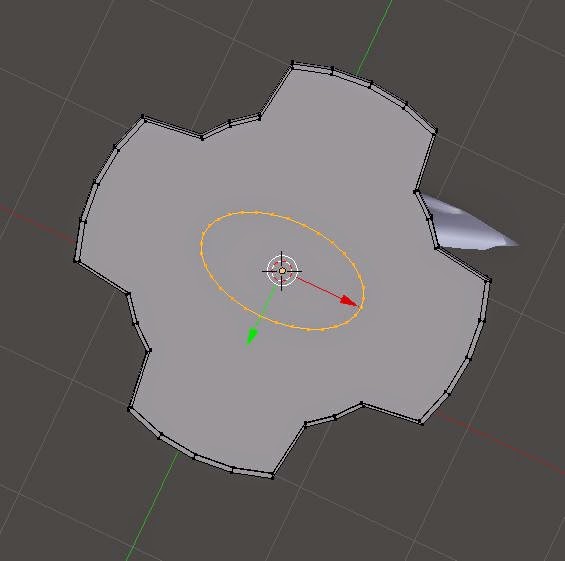
Select the face underneath the the hilt, then place the cursor in the centre by going to mesh, snap, cursor to centred. add a circle by
shift A, add circle, S for scale to whatever size you want your handle to be.
 |
| circle |
 |
| scale |
 |
| scale on x,z,y axis |
E extrude a small bit downwards, press enter extrude right click straight away scale a notch inwards to create a small lip then extrude to your desired length
 |
| extrude |
 |
| extrude |
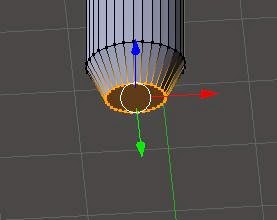
Extrude again, scale inwards and create a face by hitting
F
 |
| add face |
Select the top vertex,
 |
| top selected |
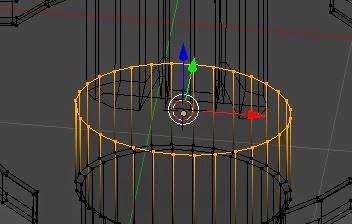
shift D to duplicate,
right click to place then right on top, hit
P to make it a brand new section.
 |
| duplicate |
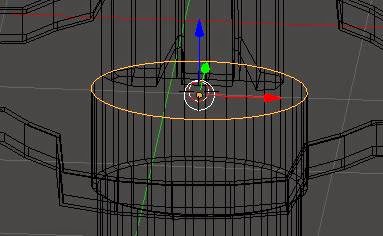
Drag it down, extrude around this size, create three loop cuts
 |
| creating loop cuts |
Use the knife tool, hit
Z so it will cut through the mesh, create a diamond shape, select all the faces and press
X delete faces.
 |
| Knife tool |
 |
| selected faces |
Add an Array modifier
 |
| Array modifier |
Use this to move and duplicate the design onto the hilt
 |
| Array modifier |
 |
| Array modifier used |
To add a material and a texture check out the tutorial on how to add a texture in Blender at
Add lighting around the scene by hitting shift A, lamp choose a type a light that suits you.
you can check the tutorial about adding light in Blender
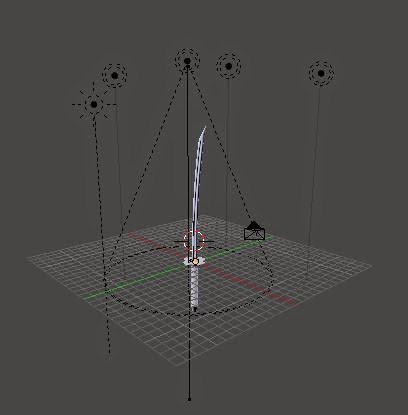 |
| light placed in scene |
|
| rendered view |

 Reviewed by Opus Web Design
on
March 09, 2015
Rating:
Reviewed by Opus Web Design
on
March 09, 2015
Rating:


